Installation (SkySpark)
Periscope Prerequisites
- The latest rev of SkySpark is recommended (3.1.4)
- Any station running Periscope must have at least 6MB available
- Officially supported browsers: latest Chrome or Firefox
- Navigate to the Settings app, then click the API tab and set allowTextPlain to True and attestCookies to False
The "su" global permission user account must be commissioned on the SkySpark host
Java 8 - (Oracle Download Link)
While SkySpark will technically run on it's own with Java 7, Periscope itself has dependencies on Java 8 - remaining in-line with Niagara's Java 8 dependencies.
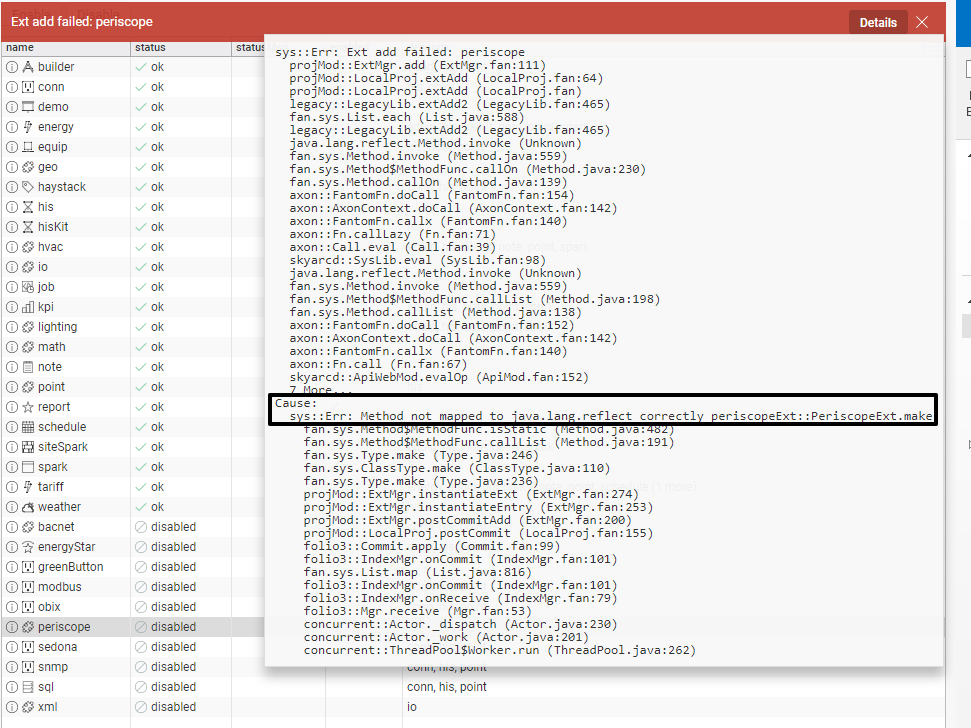
If not on JAVA 8, it will be immediately obvious when attempting to enable the extension later on because you will receive an error: "Method not mapped to java.lang.reflect correctly"
Installing Periscope
Installing Periscope Pod file
- Ensure the SkySpark service is stopped
- Copy the periscopeExt.pod file distributed by Activelogix into the lib/fan directory of the SkySpark installation
- Restart the SkySpark service
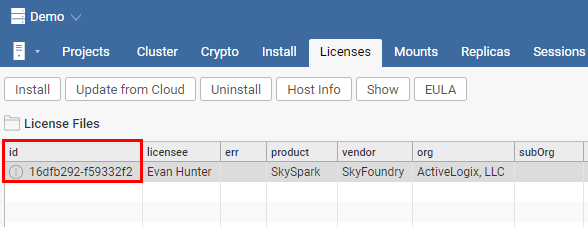
It's important that the host this pod is installed on matches up with the SkySpark ID that was licensed. You may find your Skyspark ID Host application under the licenses tab as shown below.
Enabling the Extension
- As an administrator, navigate to the project in SkySpark that you would like to use the extension with
- Navigate to the Settings app, then click the Exts tab and select Extensions in the tree-menu on the left
- Scroll until you see Periscope and click Enable

IMPORTANT: Choosing a "Home Project"
Each Periscope User in SkySpark has a home project that holds their periscope-related records that aren't necessarily specific to any data. Please keep in mind that without migrating these records, deletion may result in a loss of data as it pertains to the dashboard.
A user's home project is determined by the first project they access Periscope through. For this reason, we discourage initial testing of Periscope on the demo project with any non-temporary user as the demo project is often deleted once it is no longer necessary - which would inadvertently remove any related dashboard along with it!
(Advanced) To resolve a dashboard already in this state: migrate the records over to a new project that's not planned for removal, and swizzle the refs. Contact techsupport@activelogix.com if you need further assistance with this particular step.
Enabling this extension will automatically use the existing Folio database and create the necessary periscope tagged records for operation.
Disabling this extension will not remove these records.
If attempting to start from scratch on a project that previously had Periscope installed, it's possible you may want to delete these records before attempting to re-install. Warning: data deleted in this way is unrecoverable! Always backup your database before making any modifications.
Periscope works on the latest version of SkySpark version 3.1 at the time of writing. It's possible the old 2.0 style apps (such as extensions/settings) may change in later versions, if so, please see Skyspark documentation on enabling extensions.
Installing License File
The Periscope license needs to be installed separately. The license can be automatically "fetched" from our licensing server as long as the installation server has access to the internet.
Automatic Installation
In Periscope 4.0+, automatic installation is possible via the About page as an administrator next to the site chooser.
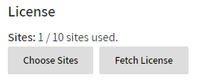
After clicking Fetch License, your license file will be downloaded from Periscope servers, copied into the appropriate directory, and loaded. You should now be able to access Periscope through a browser at http://{IP_of_host}/api/{proj}/ext/periscope. Where "{proj}" is the name of the SkySpark project the extension was enabled for previously (without the open and closing brackets). Contact licenses@activelogix.com if you run into any issues obtaining or loading your license.
If enabled for the demo project the URL would be:
- http://host/api/demo/ext/periscope
Manual Installation
To manually install the license, copy the license file into the following folder with the given name:
- {SKYSPARK_INSTALL_DIRECTORY}/var/lic/periscope.license