Managing Views
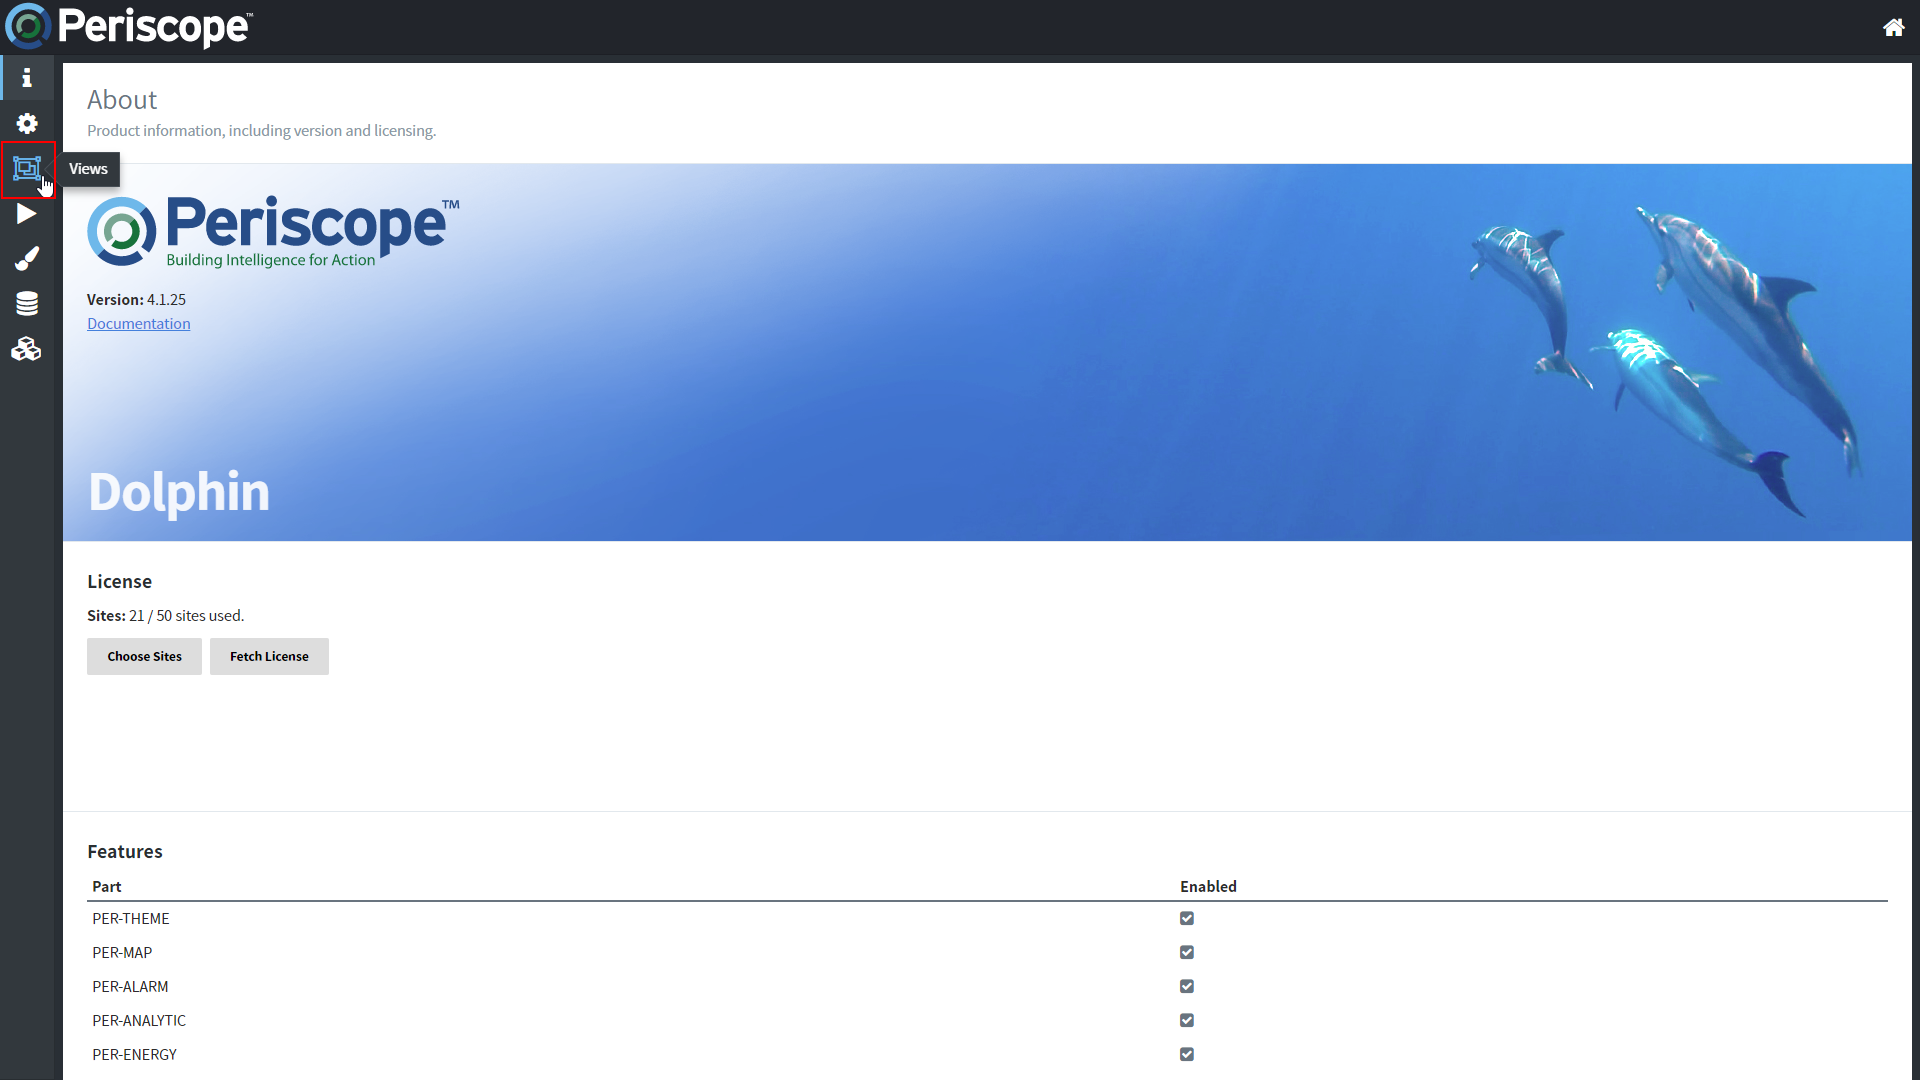
Periscope is organized by 'views'. This has replaced 'tabs' in the earlier revisions of Periscope. Views are context sensitive, meaning they can be set up to display only on certain types of levels of the hierarchy. For example, you could have a Map view that only displays at the top-level and a site dashboard that displays only if a "site" is selected. Views are represented by the icons on the left-hand side of Periscope, as shown below.

Adding, Modifying, and Deleting Views
There are two different ways to configure views:
1. By accessing the settings menu in the top right corner of the window

While in the settings configuration, select the Views icon to access the View Manager.
This will show you all the views that are currently set up, what their id is and the context they are associated with.
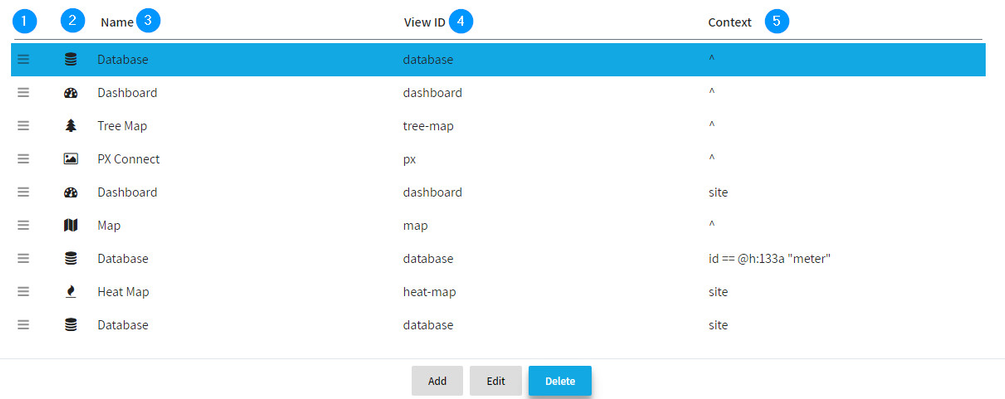
The Views main setting page is broken into 5 columns:
- Drag Handle: This can be used to re-order views by clicking and dragging on a row.
- Icon: You can set whichever icon you'd like to best represent the view that you're building. Chose from dozens of options to best fit your project.
- Name: What you'd like to call your view.
- View ID: These id's are assigned to the components that are created for Niagara behind the scenes.
- Context: The assigned location that the particular view will reside and be visible when navigating. IE if you had a "Database" view assigned to the top level (^), you would see this view when you're on the 'home' page. If you added a "Dashboard" view on a site level (site) when you navigate to any site, that dashboard would be available on the left side menu. The top 'home' page would not have this dashboard view as it was assigned to the 'site' level and not the 'top' level.
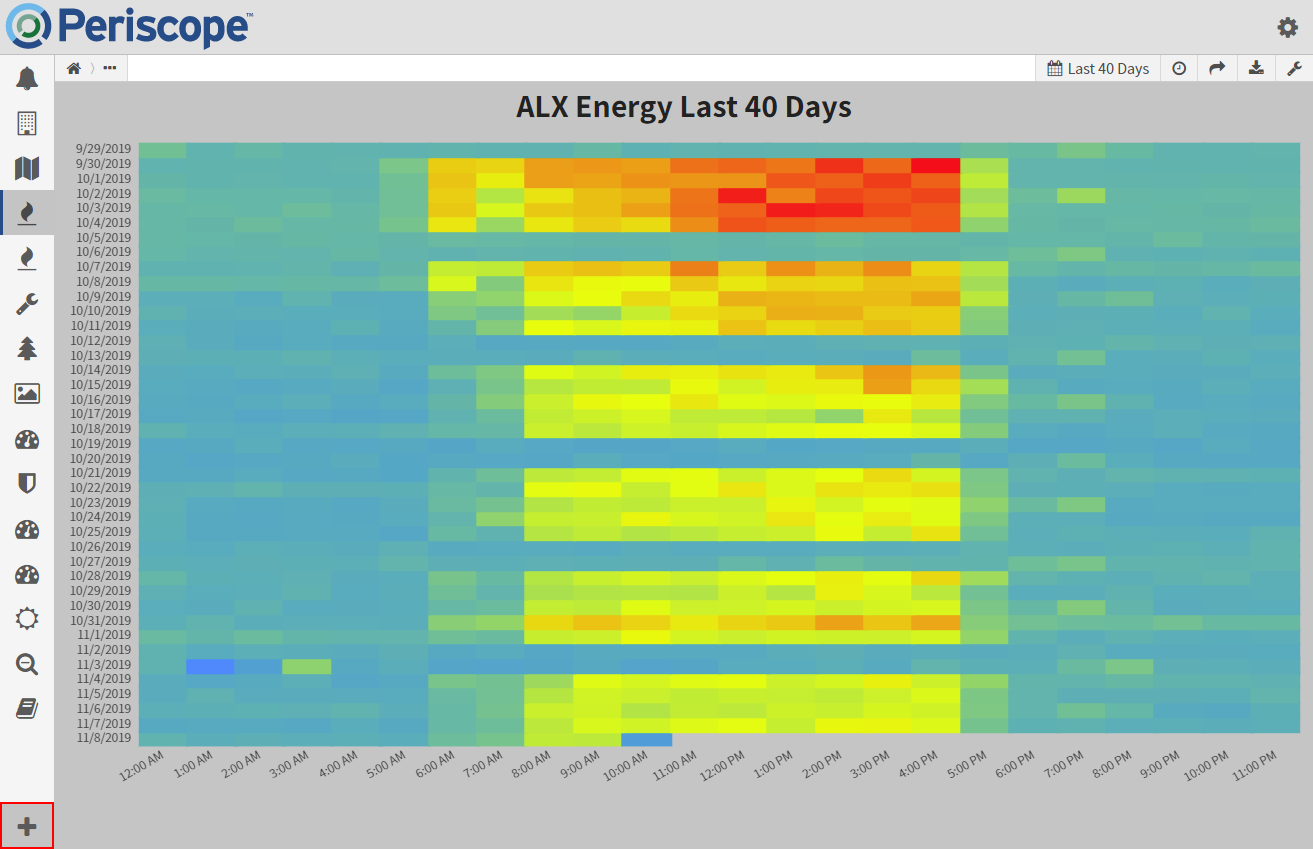
2. Or simply clicking the + button on the bottom-left once you're already in the correct context for the view you'd like to add.
Views can only be deleted or edited once created through the view settings (Method #1).
Creating a View
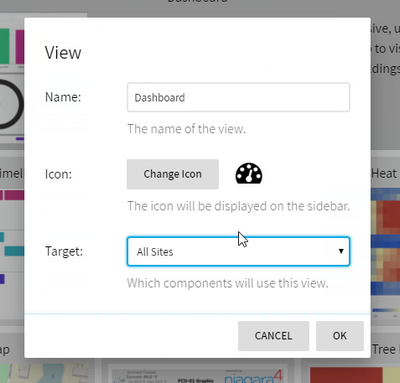
When Creating a view, click the 'Add' button at the bottom of the view pane. You're given a choice of 7 different view types, as seen below. (Availability may vary depending on your licensed feature set)
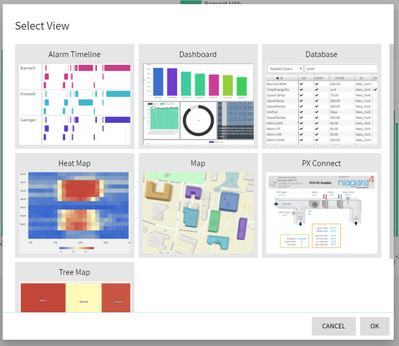
Once you select the view you'd like to add, give it a name, a unique icon, and most importantly a target designation for context. This destination can be a custom query such as "meter and elec" or "equip and vav" to allow for targeted View templates.