Green Tips
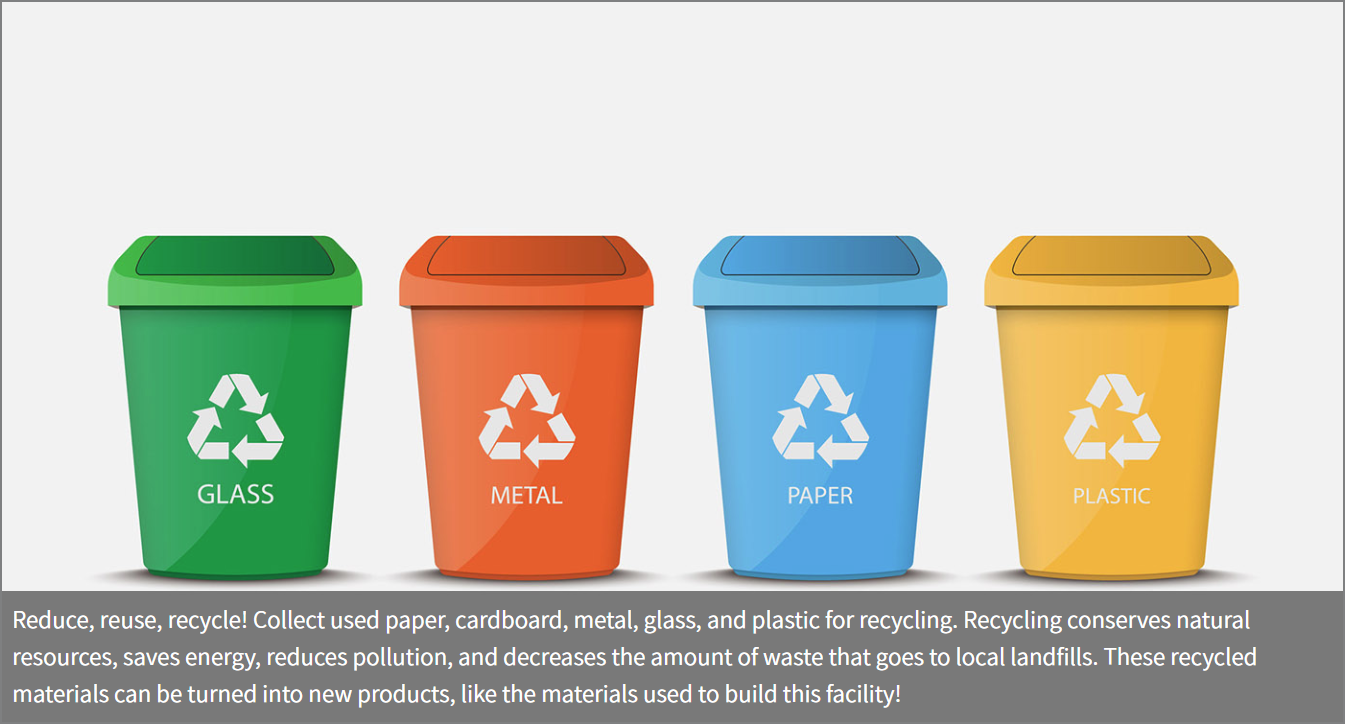
The Green Tips viewlet display an animated slideshow of images and text. Periscope provides a "green tips" slideshow out of the box which is focused on sustainability but users also have the ability to create their own slideshows with custom images and text.
Configuration
Configuration Options
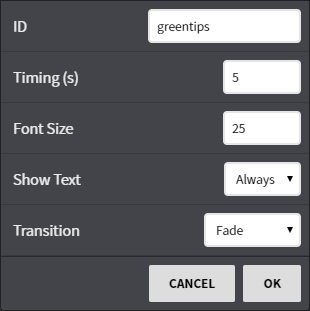
ID: Each slideshow that is created is given a custom ID in Niagara. Entering a different ID will show a different slideshow.
Timing: In seconds, the duration of each slide being shown.
- Font Size: Adjust the size of the text overlay on the slides.
- Show Text: Show the accompanying text for the image or not.
- Transition: fade, horizontal, or vertical rotation to the next slide image.
Custom Slideshows
The Green Tips viewlet has the ability to display custom slideshows with images and text. This task should be completed by someone with Niagara knowledge since it requires manual modification of the database and installation of files (images).
Step 1 - Upload Images
The first step of creating a slideshow is to place the images onto your Niagara server so that Periscope can access them. To do this, copy your images to the "shared" folder of your Station Home. It may be best to create a new folder within your shared folder. Once images are placed into your Niagara Station, they are served from the URL: http://{ip}/file/{folder}/{image} - for example, if I created a folder in my shared directory called "sustainability" and added "solar.jpg" I would access it by navigating to http://localhost/file/sustainability/solar.jpg.
Step 2 - Create Slideshow Record
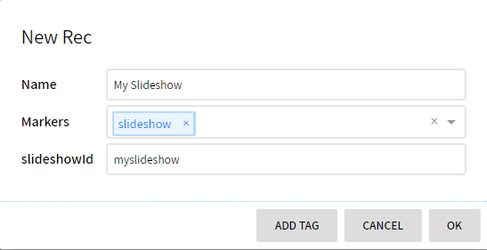
Now we need to create a new slideshow record which will be referenced by all of our images. To do this, navigate to your "Database" view within Periscope Settings and click on "New Record" to create a new Record. Once tagging is complete, the newly created record should contain:
- slideshow (Marker Tag)
- slideshowId (String) - the ID the viewlet will reference to load your slideshow
Step 3 - Create Records for each image
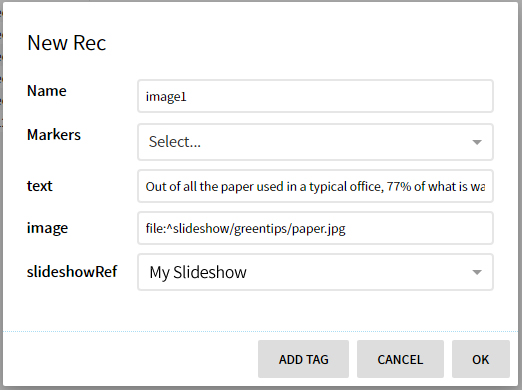
The next step is to create a new record for each image within the slideshow. This record will contain a link to the image, text to display while the image is showing, and a reference to our new slideshow record created in Step 2. Leave the 'Markers' field blank. For each image, create a new record as follows:
- slideshowRef (Ref) - reference to our slideshow record in Step 2
- text (String) - information to display as your image is displayed
- image (String) - URI to the image
To access images that have already been added to the slideshowRef to edit or delete:
- Do a query search for the slideshow. In our example, search for the marker tag 'slideshow' in the query field.
- Hover over the slideshowRef id. It will highlight a unique string id: X:XXXXX
- Do a new query search with the unique id from step 2: slideshowRef == @X:XXXXX
- From this list you can edit/delete previous images added to this slideshow.
Step 4 - Configure the Green Tips viewlet
We can now use our new slideshow in a Green Tips viewlet. To do this:
- Add a new Green Tips viewlet
- Click on Configure to access the viewlet configuration
- Set the Slideshow ID to "myslideshow" (the slideshowId used in Step 2)
This feature requires the part number PER-SUSTAIN